20.04.2015

Wenn Elfen helfen


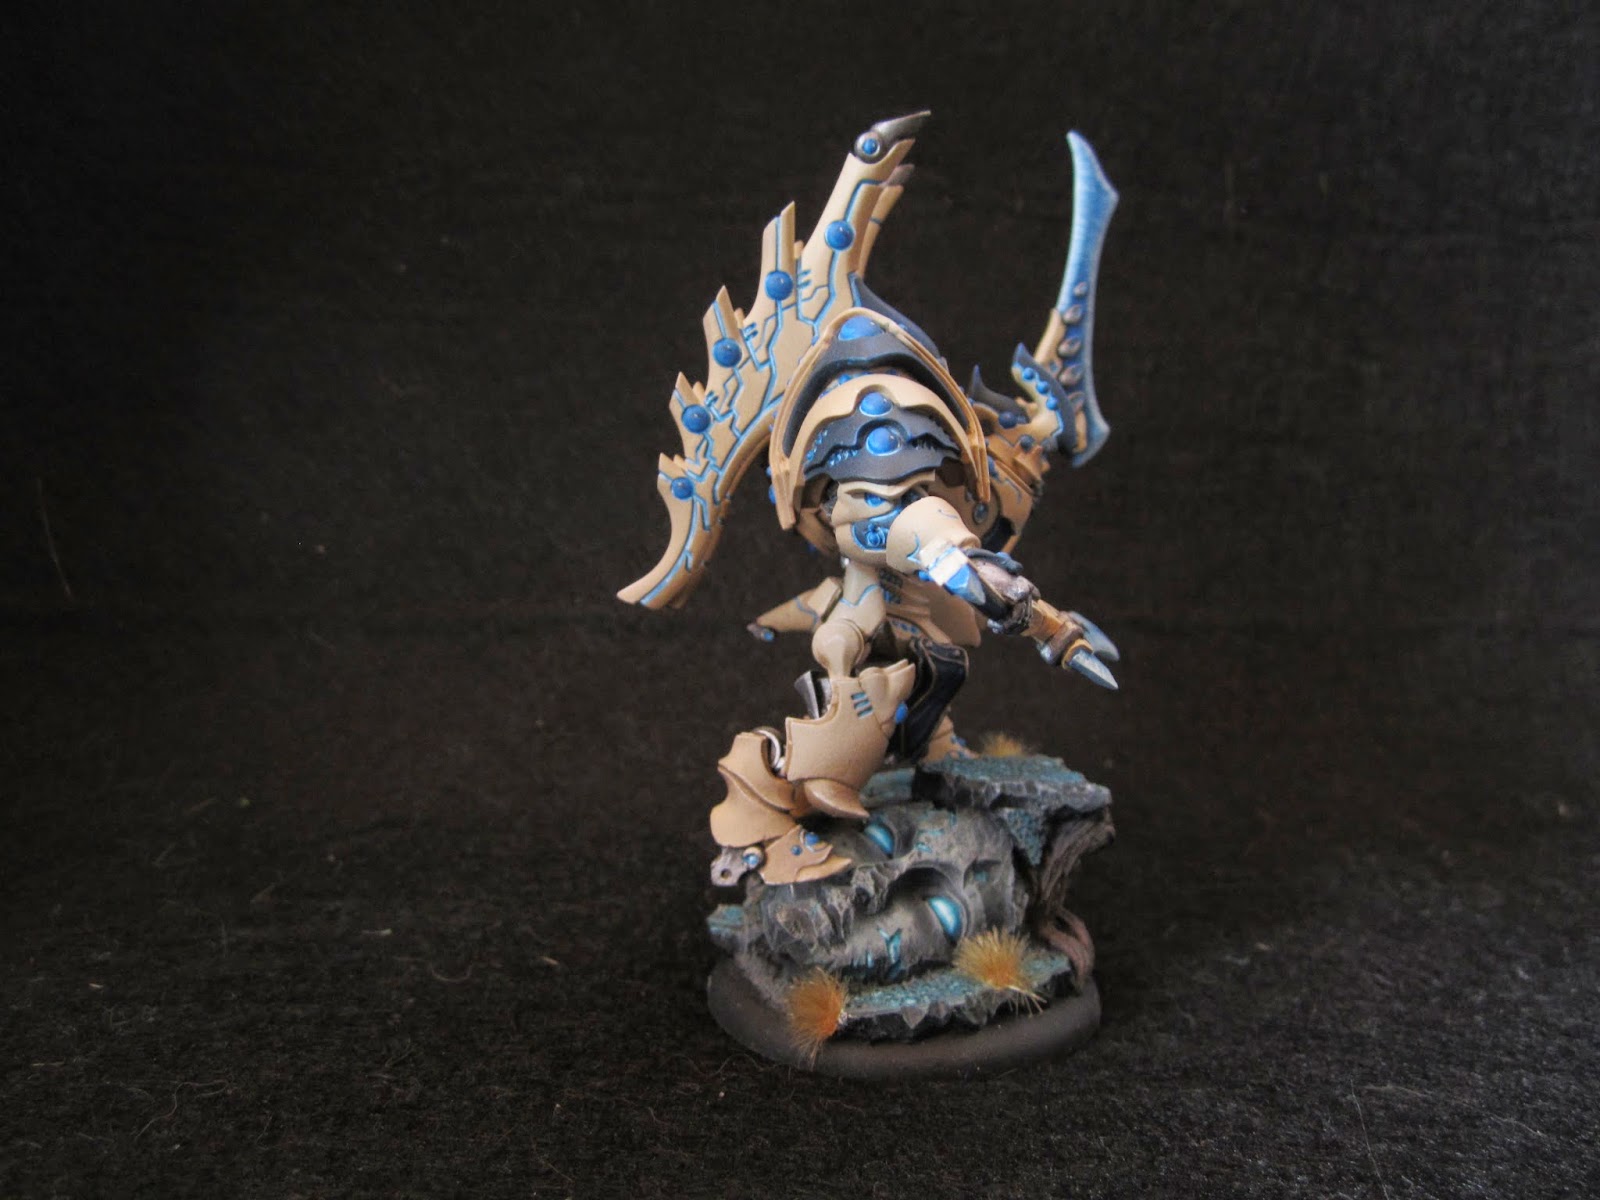
 Es ist wieder mal Elfenzeit. Die letzten marschieren grad fröhlich in ihr Paket, damit sie der neue Besitzer aufs Schlachtfeld führen kann, doch davor waren sie noch auf einer Modeschau und es wurden 1,2 Bilder geschossen.

Den Anfang macht die neue Frühjahrskollektion in dunkelblau und beige. Kombiniert wird dies mit einem schicken Ledertornister, oder einer überdimensionierten Klinge.


Auch die leichten Fahrzeuge stehen unter dem Motto schau was für fancy Schilde wir haben! Kombiniert wird hier mit einer Stangenwaffe.

Das Schützen nciht langweilig gekleidet sein müssen , beweisen diese Bilder. Dunkelblaue Pluderhosen mit Plattenrüstungen ist gerade der Schrei beim Elfenvolk.


Die Königsklasse unter den fanatischen Baumkuschlern ist dieses putzige Exemplar. Imperatus oder liebevoll auch PIMPERATUS genannt, kombiniert er die Trendfarben mit 2 Schwertern. Weil was ist besser als ein riesiges Schwert? Genau 2!


 Tränen Ihnen auch die Augen? Sind Sie oft müde und abgespannt? Dann probieren Sie die neue Energiekur aus Scyra! Fabelhaftes Aussehen bei 50000 Volt.


Was ich heute gelernt habe: Es ist schön ein Projekt abzuschließen.

Was ich heute NICHT gelernt habe: Ein Neues anzufangen ;)


19.04.2015

Golden Vinci Reminder!

Mit freundlicher Unterstützung von:
http://www.tinytalesstudio.com/    http://www.bigpandav.de/


Hello people out there, the end of the contest is in exact two weeks. I hope you all are working hard at your entrys ;-)

Until now we have 25 entrys and we hope there will be many many more the next two weeks!

Have fun and show us your work.

Cheers

The Vinci Crew!

11.04.2015

Malkränzchen XS

Die Pinsel sind noch nicht ganz trocken und die Gäste gerade aus dem Haus, gibts ein paar Bilder zu unserem kleinem Treffen. Den Auftakt macht ein unscheinbarer Brief den ich heute abgeholt habe.


 Drinnen ein kleines Zipp Tütchen mit....nem Gussgrat....ah ne wart mal umdrehen...

Einer der coolsten Büsten, die es gibt und die ERSTE, die ich mir gekauft habe. Ich werde alt. Wenn ich jetzt noch den historischen Kram anfange, ist es sicher ;)

Der Dicke wird dann irgend wann mal angemalt, wenn mich die Muse küsst und ich mich endlich entscheiden kann wie er ausehen soll.
Naja zu dritt gings dann voller Tatendrang los und es wurden neue Ideen für Armeen entwickelt.
 Mein Ettapensieg ging an Dynamo, den ich bis zum blau geschafft habe. Hmm hier ist er nicht blau.

 Ansonsten wurde viel gequatscht, fachgesimpelt, Tee getrunken, ah ja und etwas gemalt, genau so wie es sein soll!

Danke an meine 2 Mitsstreiter von heute und bald gibts auch Bilder von den fertigen Elfen.

Was ich heute gelernt habe: Ich mag Nilpferde.


Was ich heute nicht gelernt habe: Ein vietnamesisches Gedicht auswendig zu lernen.

Leaving Home

Hello guys

Today i will write a bigger post. It´s a step by step of my current project. A showbase from a to z.
So get your cookies lay back and enjoy :-)

After planing the base i started with the building shell. I have used plastic card for the borders of the base to achieve clear sides. Often it is a bit confusing to build the terrain over the borders of the plinth.
After that construction i placed cork in the areas i want to have rocks and cliffs. This step is only to save some milliput. You can also use styrofoam or stuff like that. It is just a rough sketch of the terrain.


After this steps it was time to rarefy the rocks. Now i have used milliput. I sculpt every base with milliput because it is cheap and you can achieve nice textures very easily. I placed little frazzles next to each other till i was satisfied with the result. As long as all was wet i have pushed textures in the material with a stone. You can variegate the result with many different stones. Maybe some bigger ones for the main part and some smaller ones for the details. That could be helpful to get a more realistic result. But don´t carry too much attention to this step. When all is dried you have to use your cutterknife to get more texture in the surface.
If you are happy with your texture catch your primer and prime the base with the method you prefer.

Now it should look like this :-)


Now i have used my airbrush for the basework of painting. Some brownish greytones for the rocks and reddisch browntones for the earth between the rocks. Which colours you will use depends from your personal taste so i will not write all the colour names i have used. Just a view on my wet palette before i have started to paint the rocks. I used some greytones from Scale 75 and also some of their inks. I really love the colour range from Scale.
As the rocks were ready i have painted the place between them with a blue basecoat for the following freehand. But first some pics :-)


Ok....Freehands. I often try to avoid it to paint a freehand because i am not a well organized painter. I have never tried to paint a grid for a complex picture so all is intuitionally and not planed. Just as well i don´t like miniatures covered with freehands. Mostly it seems to me the painter used freehands to show his skills and not to enhance the miniature.  But in the past time you can see more and more freehands of terrain involved in a showbase and i like this idea pretty much. So it was time to give myself a try.
I wanted to paint the Erebor because i think it fits perfectly to this rocky base for my dwarf
 from Fernando Ruiz Miniatures .

I have started the freehand with the outlines to get an idea how it will work with the base. The nesxt step was to bring in some surfaces like snow and cliffs to fill the freehand. I have added some tiny lines and scratches to simulate the different volumes of the mountain. Some snow areas here and the. Have added some clouds to bring some life to the sky.


The last step i did was to bring some different light situation. I wanted a dusk lightning for the whole scene so i have added some reddish and yellow tones on the parts were i thought the light would be.
So now here is the current status of the base. I hope you get a feeling for the idea and you have enjoyed this little step by step.

Regards

Thomas


04.04.2015

Sculpting time =) SciFi Ork bust


Hey Guys,

a few weeks ago I had a big motivation to paint an Orc model. I always saw cool painted Orc models from my Vinci Buddy Thomas 1, 2, 3 and want to paint my own version. 
My wish was a bust. But not a fantasy bust like the all known pirate orc or something else. It should be a SciFi Orc bust with big muscles, a lot of gear and bionics AND a cigarette really important for a orc in my opinion :)… puuuh after a long search in the world wide web I gave up. Nothing for me I wanted to paint. So the only way for me to paint a model like this, is to sculpt my own version :D

Sadly I forgot to take pictures from the first steps but I will show more detailed pictures in the next project.

The first bust I have sculpted is my No’yok an Oceanwarrior bust. It was a really simple work without many details or without much character. My new bust should have much more character and a lot of details. I want that the painter has a lot of fun during the painting so It should have enough but not too much details.

Ok I started with the bust with a roughly structure out of Super Sculpey. I baked this one because I need a solid basement for my final putty. For sculpting I use BeesPutty Plastic Firm. I reeeeally like this stuff and it’s absolutely awesome to work with! Check out BeesPutty here or the Facebookpage.

After around 4 hours of work roughly sketched :) ...


I asked my Vinci Bro’s about their opinion and change some small parts, thanks Bro's ;)! After around three additional hours I got this one.


Sadly I have no sculpt God next to me who can help me with the anatomy and give me feedback on the main important things, so I was glad when I remembered that Raffa from MassiveVoodoo came for a Beginners Class Workshop to Blumberg Achdorf. Raffa checked the sculpt and gave me some tips about a few anatomic problems. Small things to change but a huge effect! Thanks Raffa for the help :D!!! So I remove and correct some areas and added a few more details. 

This is now the current state of the bust. I want to finish the “naked” version first. Then I will bake it and add the gear armory and other stuff.


I hope you like it :) more pictures soon!


Cheers Manu